Microsoft has created and launched a website where IT security professionals can research threats and find security related tools and resource. The site is named Malware Protection Centre Portal. It servers as an Information Clearing house for IT Security Professionals. Aggregating information on thousands of threats and offering links to security tools and resources. The website was first previewed in April 2007 and after collecting the user feed backs, the site is fully operational now.
The homepage of the portal contains:
Top 10 threats for the Desktops, Emails, Adwares / Spywares and also the threats identified by the Microsoft Security Response Team (MSRT). These lists are updated on a weekly basis.
HOW TO BLOCK GOOGLE / GTALK USING ISA SERVER 2004 (WITHOUT BLOCKING GOOGLE AND GMAIL) - ARTICLE BY MANU ZACHARIA Thanks to http://www.theadmins.info
SOME USEFUL INFO
To block Google Talk, I am using the User-Agent field in the HTTP header. How I got it? Simple, I usedMicrosoft Network Monitorto capture packets that involved the authentication of GTalk. See the figure below:
To configure ISA Server 2004 to block Google Talk, follow the steps:
§Right click on the access rule that allows HTTP traffic from the internal network to the external network (Internet) and click on “Configure HTTP”. See the figure below:
§Click on theSignaturestab. (refer the screenshot below)
§Click on theAddbutton and enter the details as shown below:
§Click onOKto return to the “Configure HTTP policy for rule” window. (refer screenshot below).
.
§Click OK once again to close the window.
§Now from the client’s machine, if you try to login to Google Talk using your Gmail ID, you will get the error window as shown below:
HOW TO BLOCK WEB BASED GTALK INSIDE GMAIL.
The easiest way to do is to block all traffic to chatenabled.mail.google.com
How we got it. Simple – again through packet capturing, but this time I used, Wireshark.
The steps are as follows:
Under ToolBox, click onNewand then onURL setto create a new URL set. (refer screen shot)
Enter the details as shown below and click on OK button.
Once we have created the URL set, click on theTaskstab (Refer screen shot)
Click on "Create New Access Rule". The New Access Rule Wizard window will appear.
Enter the Access rule name and click on Next.
Click on Deny radio button and click on Next
SelectAll outbound trafficfrom the drop down list and click on next.
TheAccess Rule Sourceswindow will appear. Click onAddbutton to open theAdd Network Entitieswindow
Click onInternaland click onAddbutton.
The internal network will be added to the window. Click on Next.
The Access Rule Destination window will appear. Click on Add button. The Add Network Entities window will appear.
Here select the URL Set created in the previous section and click Add.
The URL set will be added to the window. ClickNext.
Make sure that All Users are selected and click on Next.
§The Completing the New Access Rule Wizard window will appear. Click on Finish and click on Apply at the top of the window.
Now from the client’s system, when you login to Gmail account, the chat mini window on the left side of the window will be grayed out as shown below.
Hope this was helpful in solving your sys admin issue.
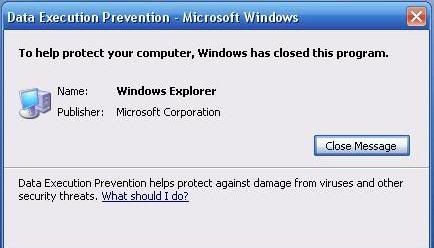
Data Execution Prevention – Microsoft Windows To help protect your computer, Windows has closed this program. Name: program name Publisher: program publisher
Data Execution Prevention helps protect against damage from viruses or other threats.
Solution:
To avoid this behavior, contact your program vendor to see if an update is available that enables that program to work correctly with DEP. If not you can use the workaround below:-
If your computer is set to apply DEP to all programs and services, the DEP error message will have a Change Settings button.
When you receive the error message that is mentioned in the “Symptoms” section, click Change Settings.
Click to select the check box next to the program, and then click Apply.
When you are prompted to restart your computer, click OK two times, and then restart your system.
You can also add an exception for the program by using System Properties in Control Panel. To do this, follow the steps below:
Click Start, click Run, type sysdm.cpl, and then click OK.
Click the Advanced tab, click Performance, and then click Settings.
In Performance Options, click the Data Execution Prevention tab, and then click Add.
In the Open dialog box, locate and then click the program.
Click Open, click Apply, and then click OK. When you are prompted to restart your computer, click OK.
When your computer is configured to turn on DEP for essential Windows programs and services only, you cannot add an exception for a program. Also, if the DEP error message continues to appear, a program may be installed that extends Windows functionality. This program may be installed so that it causes a DEP problem in an important Windows program or service.
If this behavior is recent and has not occurred before, you may be able to prevent the DEP error message by removing recently installed programs.
or
Right-Click on My Computer>Properties
Click on Advanced>Settings [Settings under Performance Section]
Click on Data Prevention Execution Tab
Select "Turn On DEP for all programs and services except those I select" option which is the second option
Then click on "Add.." button, browse and locate explorer.exe [c:\WINDOWS\explorer.exe]